

How To Use A Nail Gun With An Air Compressor
An air compressor is a power tool that generates pressurized air. The power of this pressurized air is then used to power a whole host of tools. In this mail service I'k going to show you how to setup and utilize a portable air compressor and pneumatic boom gun.
*This post is sponsored by The Home Depot and contains affiliate links and I will exist compensated if you brand a purchase after clicking on my links.
An air compressor can exist used in a ton of applications such as inflating tires, powering pigment sprayers, and other pneumatic tools like sanders and blast guns. When I first started this "DIY life" I researched smash guns. At the fourth dimension I constitute the price of a nail gun was pneumatic blast gun, one that is powered by an air compressor, was way more affordable than a battery operated blast gun. So I purchased a compressor along with a blast gun. This is what I wish I'd known when everything arrived.
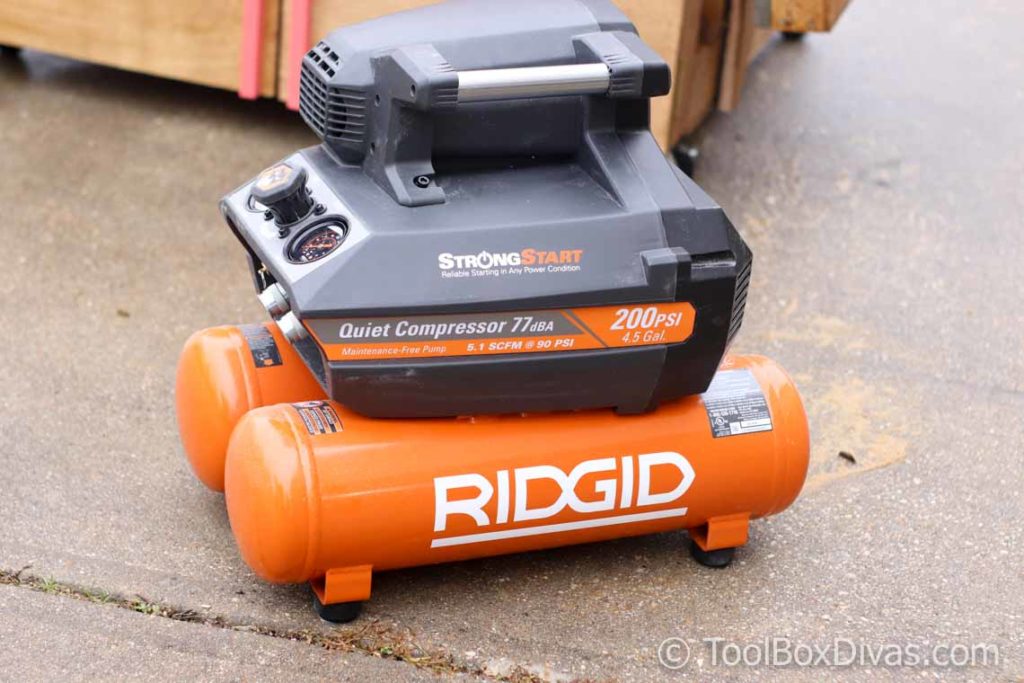
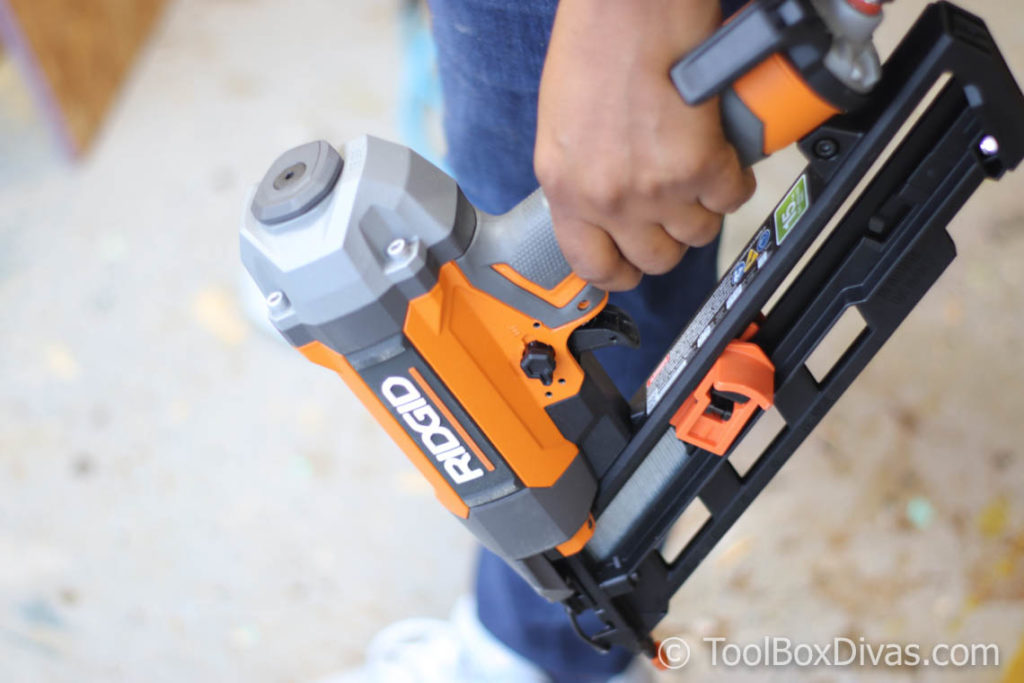
For this tutorial, we are going to using the RIDGID 4.5 Gal. Portable Electric Repose Air Compressor paired with the RIDGID xv-Approximate 2-1/ii in. Angled Finish Nailer. While the features of the tools may differ slightly based upon the brand, the principal of how to set up and use a compressor is the aforementioned.
The Air Compressor
RIDGID 4.5 Gal. Portable Electrical Tranquility Air Compressor is corded and comes equipped with 200 PSI (Pounds Per Square Inch). PSI is the measurement of the pressure exerted by the force of the air. It can be used with a tool that requires upward to 150 PSI. I really like this compressor because compared to similar models this compressor is not as noisy at 77dBA. It has StrongStart technology for reliable starting on any task site and all-time of all, it'south backed by RIDGID'south 3-year warranty.
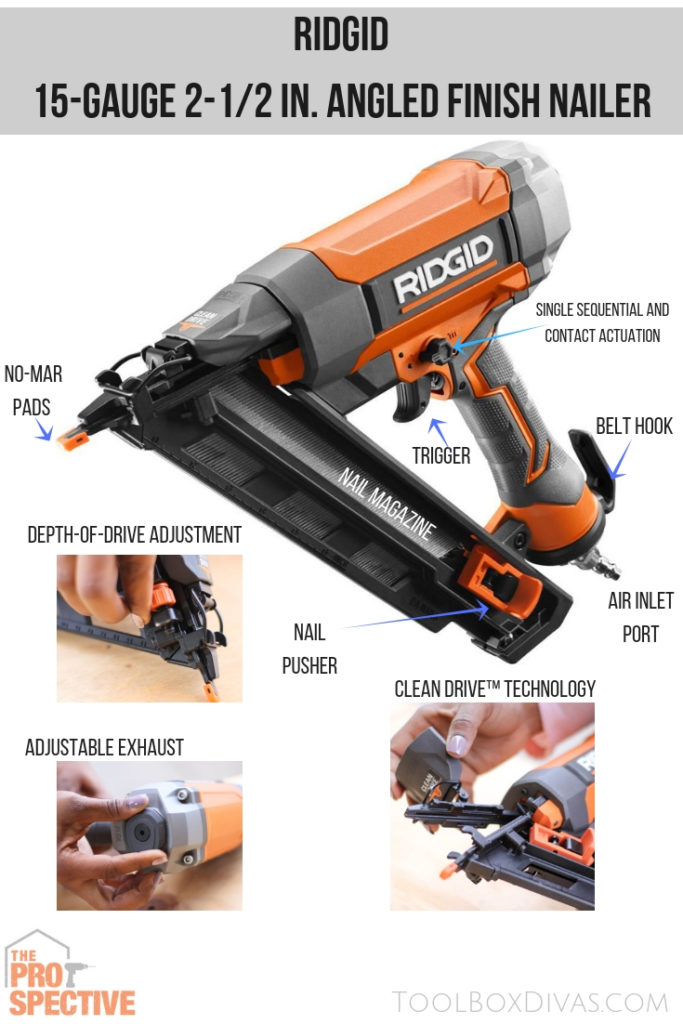
The Nail Gun
RIDGID 15-Gauge two-1/2 in. Angled Finish Nailer comes with afinish nailer, 3 no-mar pads, and contractor bag. It hasCleanDrive Technology which offers 17x more consecutive perfect drives. And backed byRIDGID's warranty information technology comes withfree parts and service for life with the registration of your blast gun.
Here's what Yous'll Need to get started
- Safety Goggles
- Husky 1/4 in. x fifty ft. Polyurethane Air Hose
- Husky 4-Piece Quick Connect Kit
- PTFE Tape or Teflon Tape
Setting up the Compressor
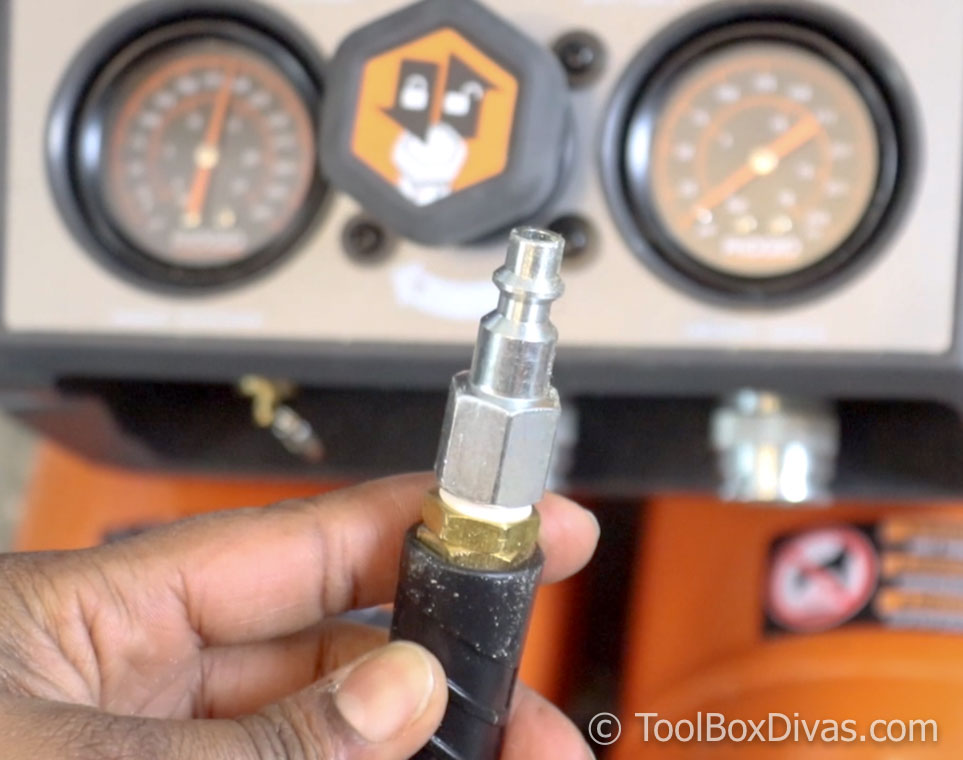
To connect the air compressor to a tool y'all'll demand to adhere a hose and the connectors. And then substantially you'll demand a ane/four in. NPT female coupler, a i/iv in. or an NPT male coupling and a 1/iv in. NPT male plug or a 1/4 in. NPT female plug, a hose and PTFE tape. Luckily you can notice most of the connexion pieces you'd need to get started in the Husky 4-Piece Quick Connect Kit.

Stride 1.
Start by adding Teflon record to one terminate of the hose. Be careful not to add too much. Too much tape can prevent the air from flowing from the compressor to the tool or vice versa.
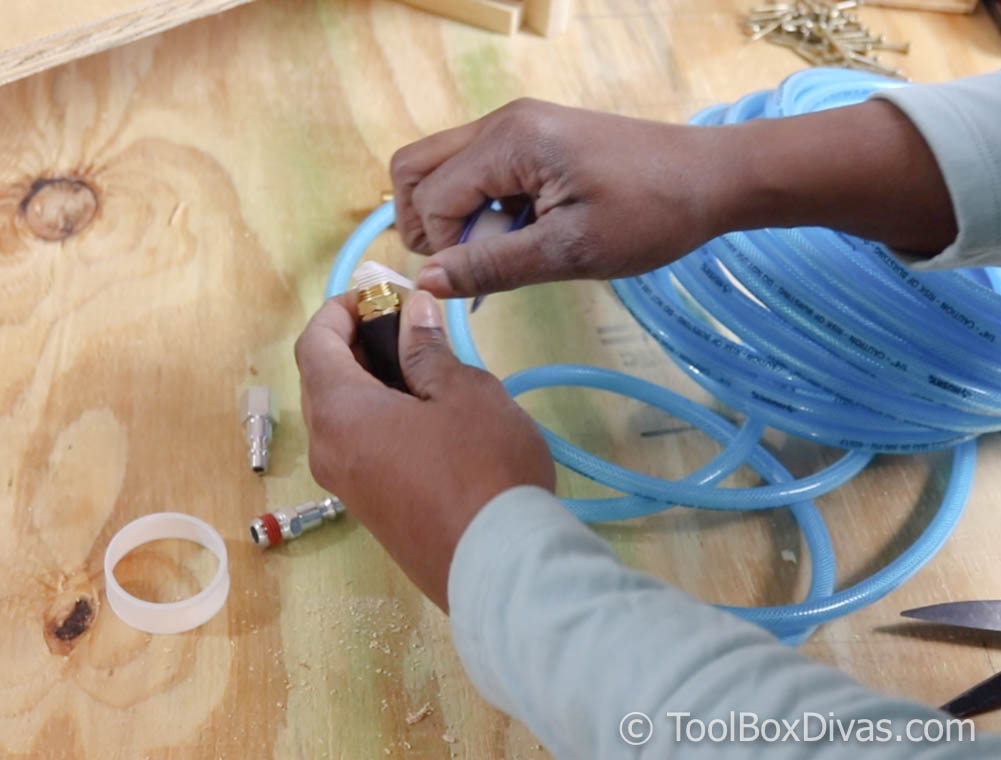
And screw in place the Universal Coupler.
Tighten with a wrench. two Wrenches might arrive easier to grip and tighten the connectors. 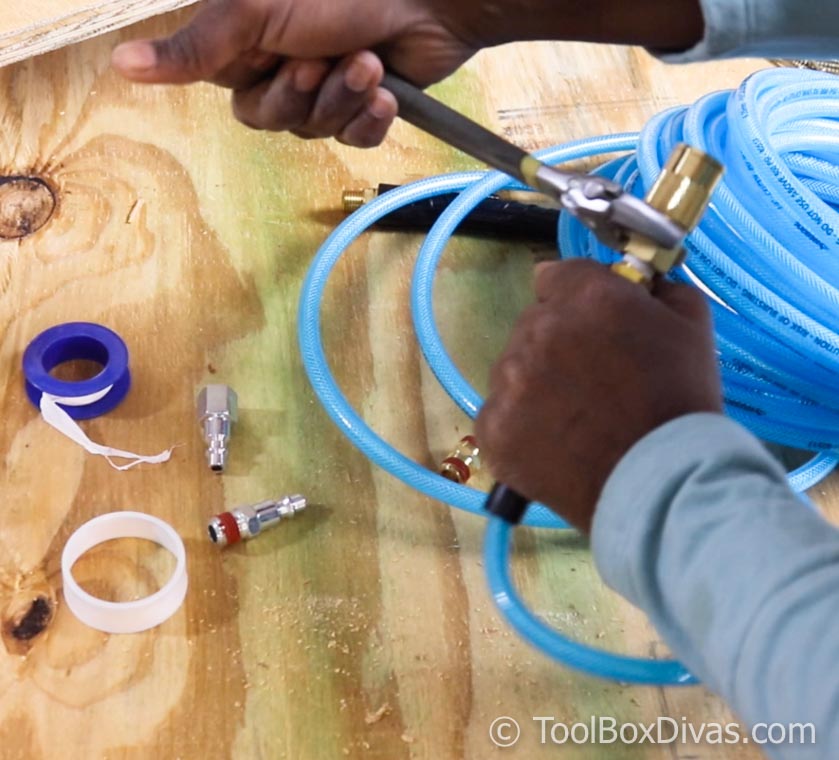
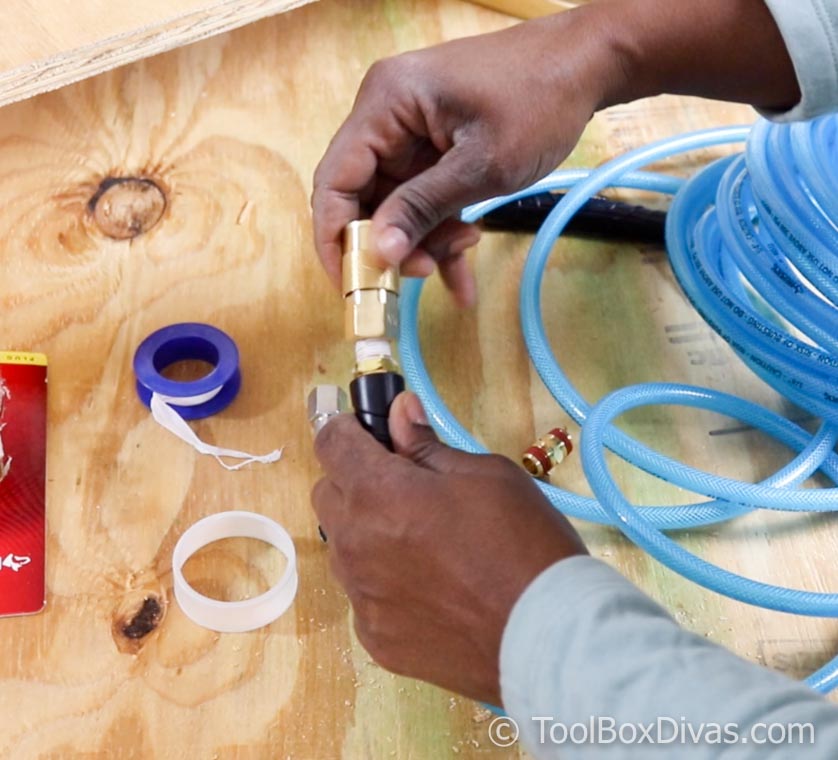
Step 2.
Apply Teflon tape to the other end of the hose and spiral on the 1/4 in. NPT IM Brass Female Plug (NPT stands for National Piping Thread).

Tighten with a wrench. Rememeber 2 Wrenches might make it easier to grip and tighten the connectors.
Step 3.
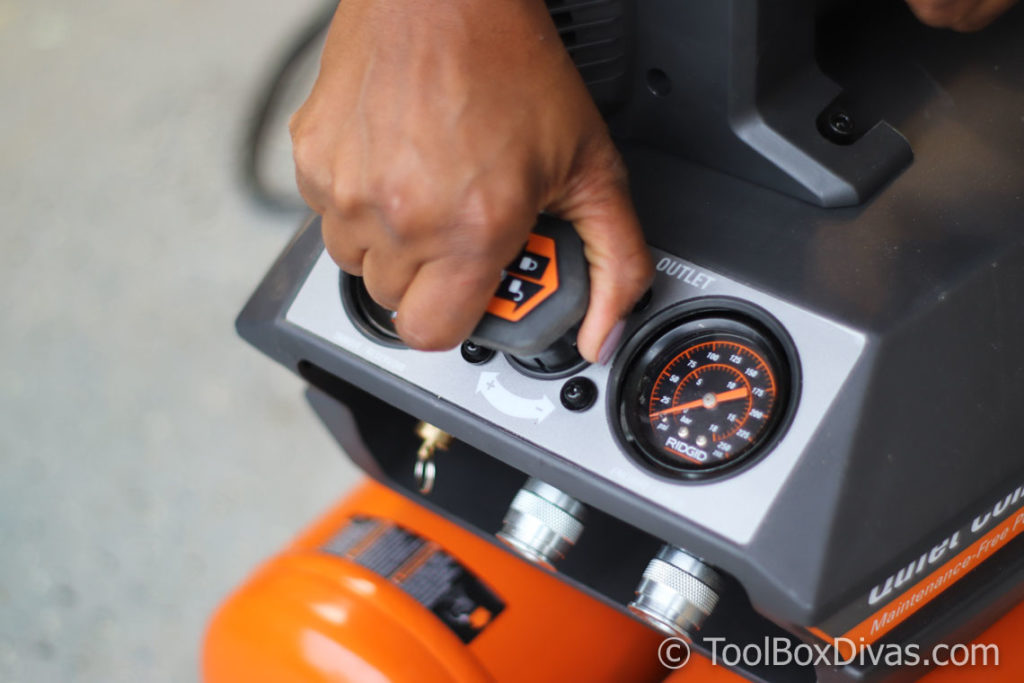
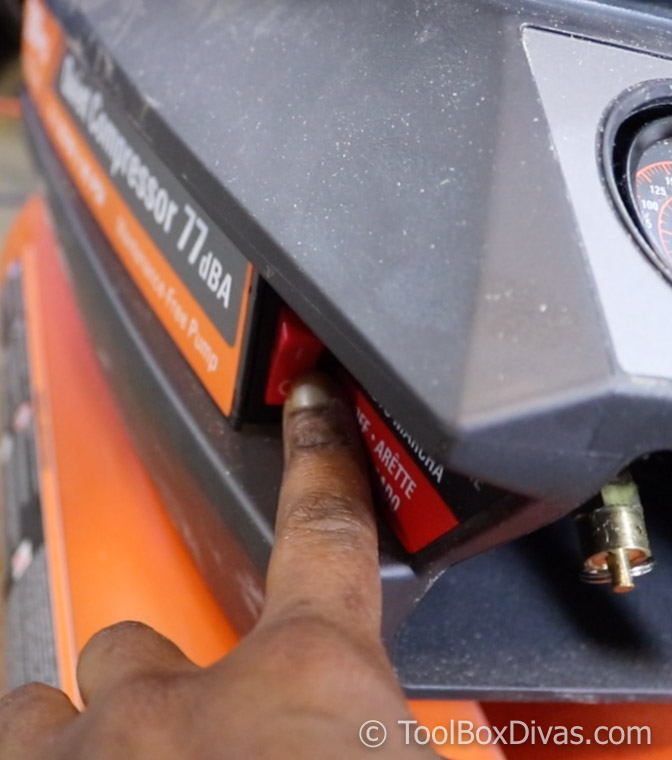
Plug in the compressor and plow it on. The RIDGID 4.5 Gal. Portable Electric Quiet Air Compressor volition automatically start to pressurize.
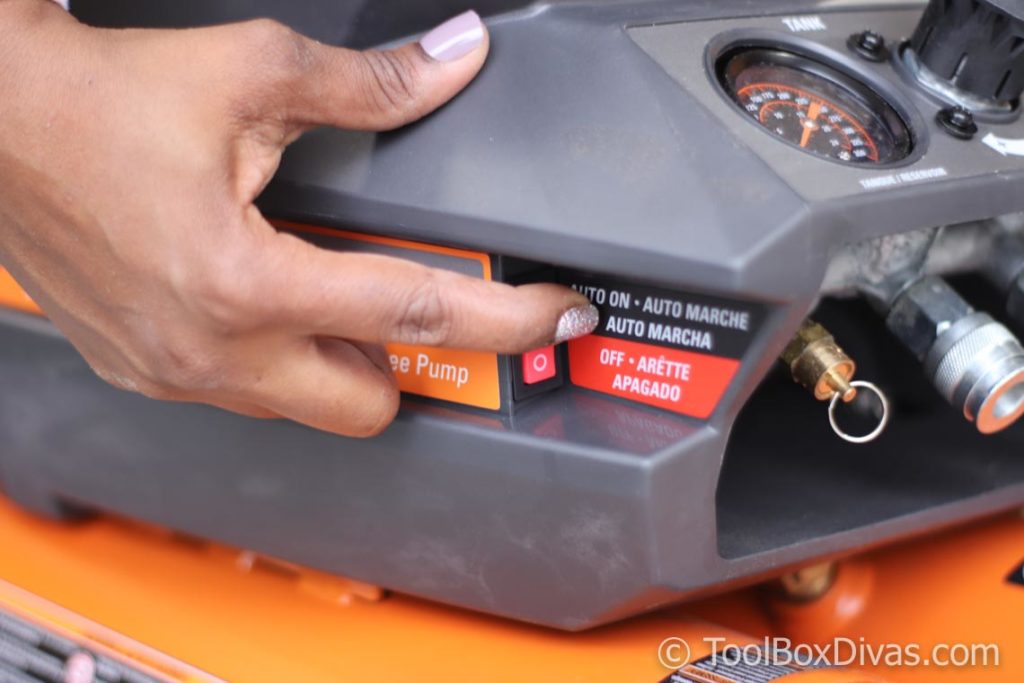
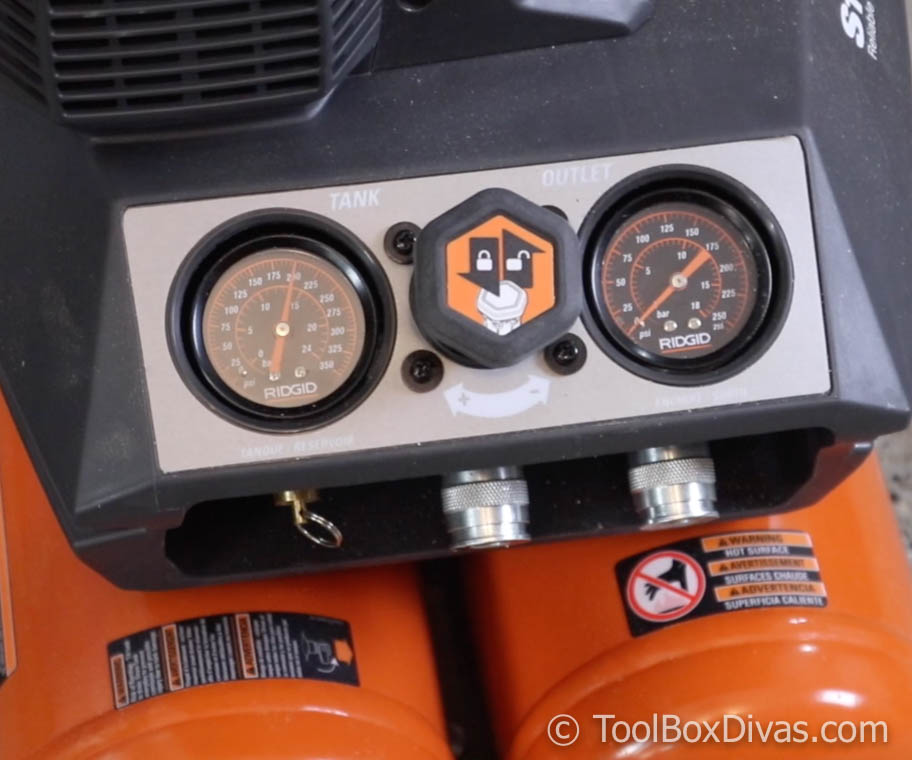
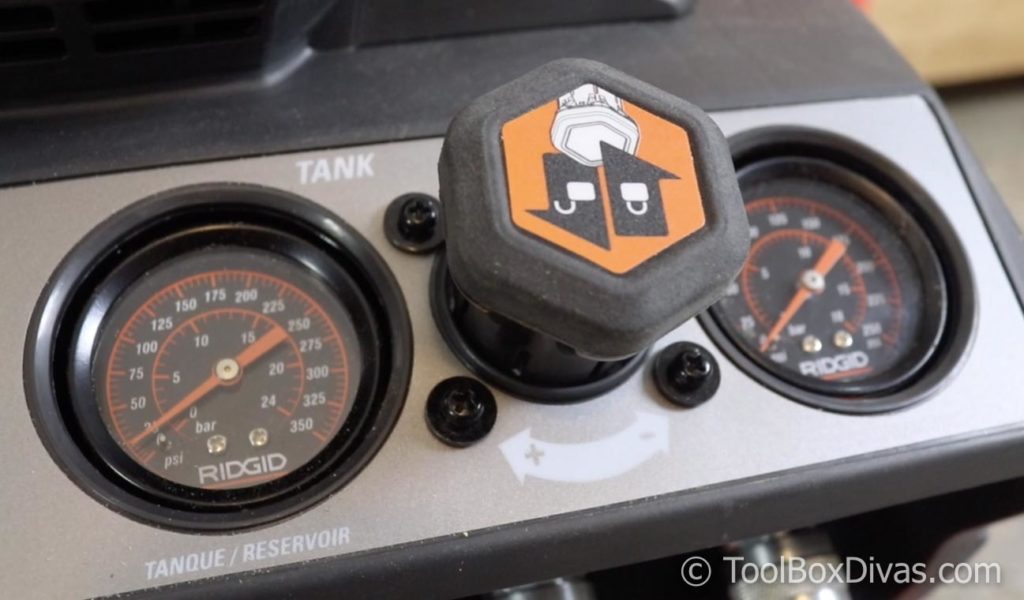
You volition see the Take force per unit area gauge to the left move upward and information technology will automatically stop in one case it hits a PSI of 200. (Please Note: if the tank force per unit area is does not increment the Drain valve at the bottom of the tank maybe open.) Notice the Outlet pressure gauge should exist at 0 PSI. The outlet pressure guess shows how much pressure is beingness sent through the hose to the tool. Yous want outlet gauge to be at nil before attaching the tool. Information technology will make attaching the tool easier.
Step iv.
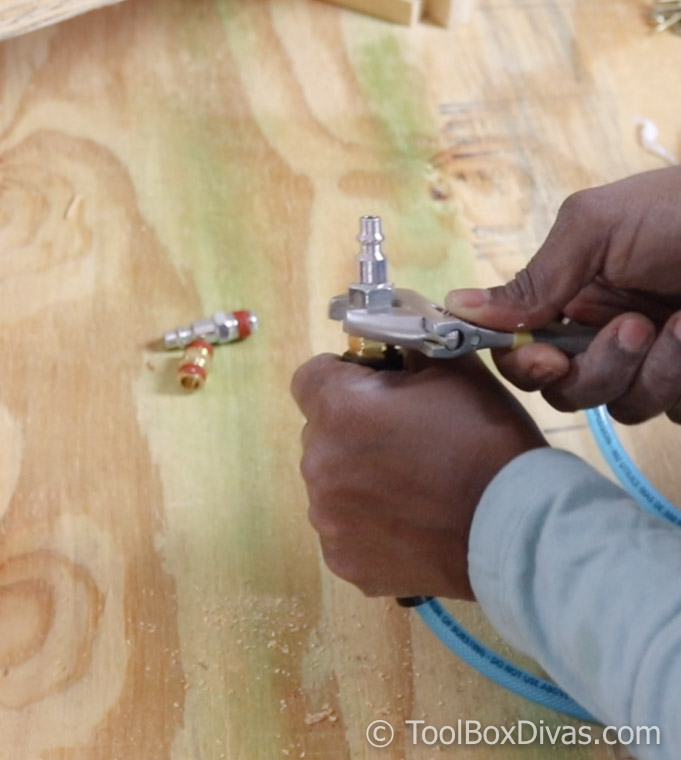
Attach the female plug into the universal coupler on the front of the compressor.
To attach button the coupler up and insert the female plug.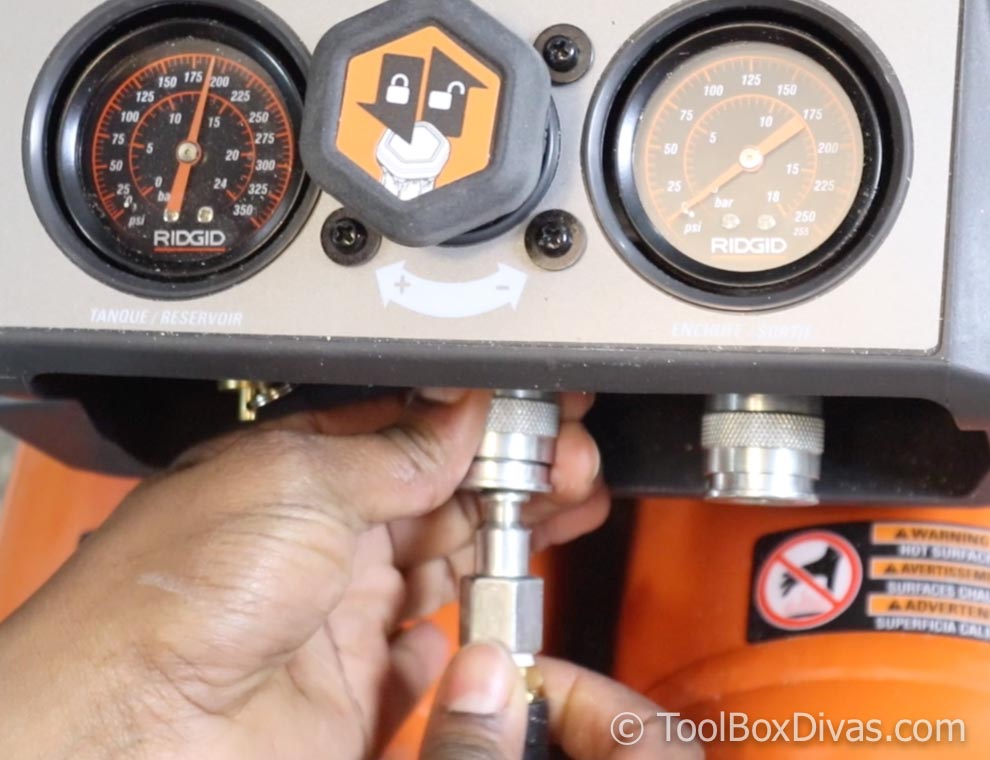
Do the same at the opposite end of the hose connecting it to the pneumatic tool. Nosotros are connecting it to the RIDGID 15-Gauge 2-ane/2 in. Angled Finish Nailer.
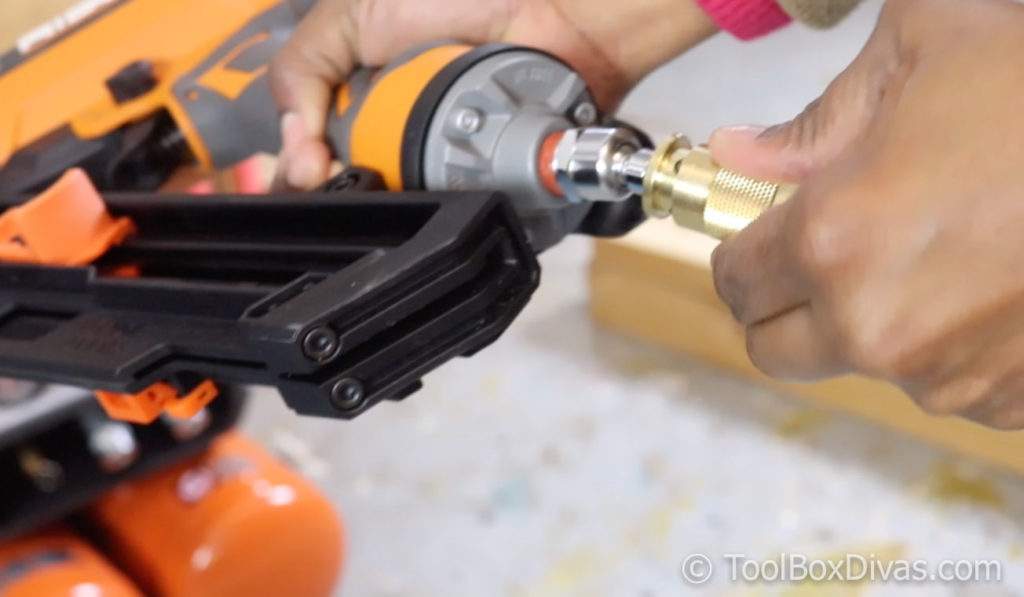
Once it'south all attached pull the Pressure Regulator Knob out and turn it clockwise to increase the outlet PSI. Note you desire to that the outlet PSI should be set to the recommended PSI noted for the tool.
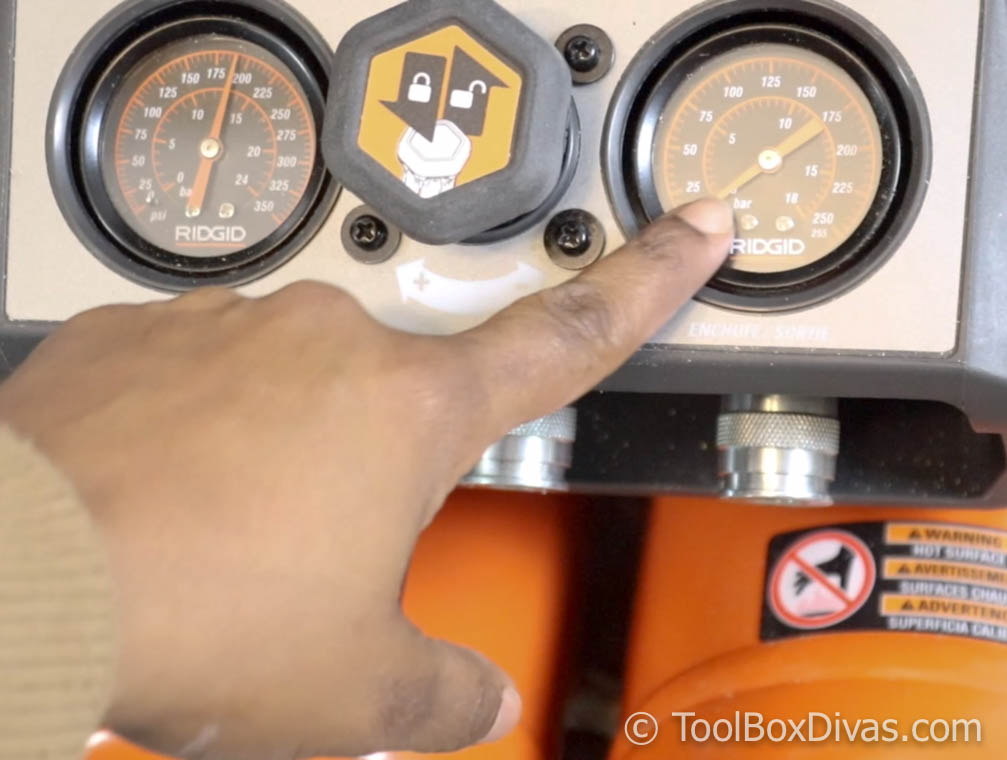
This information can be plant in the manual for the pneumatic tool y'all are connecting. In this case, we are connecting the RIDGID 15-Gauge ii-ane/2 in. Angled Terminate Nailer which has an operating pressure of 70-120 psi.

Step 5. Using the Nail Gun
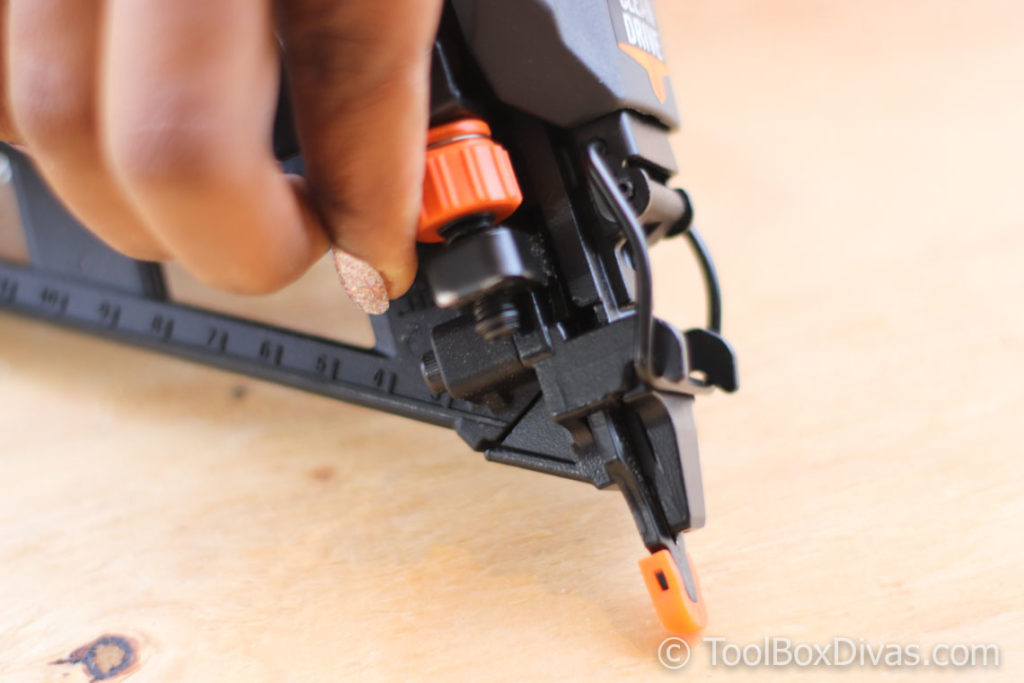
Y'all can suit the depth in which the nail is driven into the material past turning the depth adjustment knob.
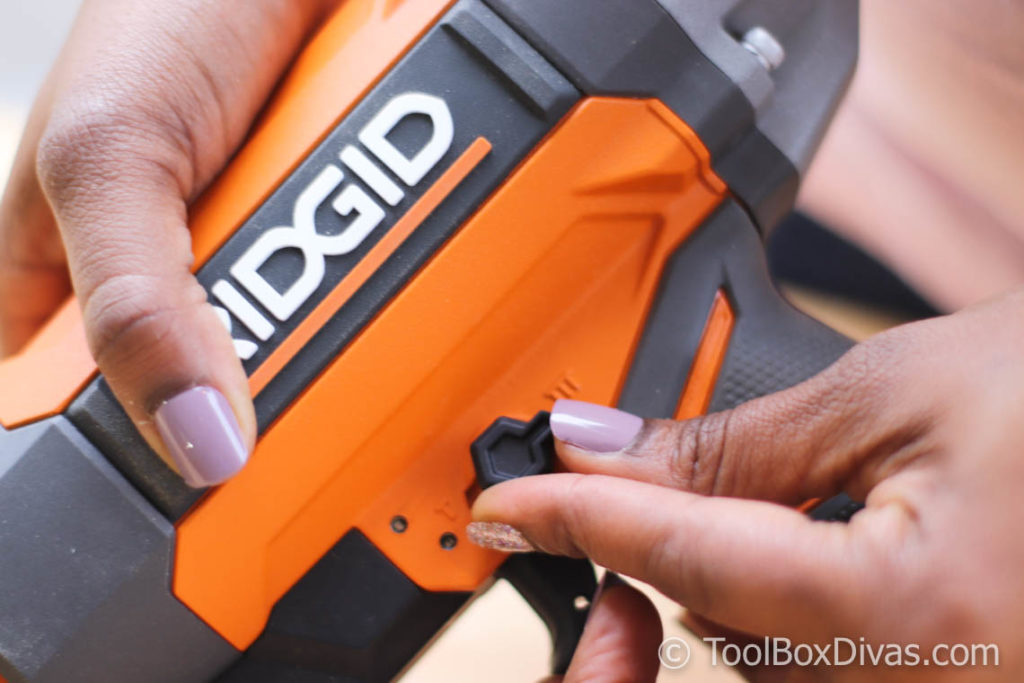
With the RIDGID 15-Approximate ii-1/two in. Angled Finish Nailer you can select the actuation manner, Single sequential actuation (which is the most accurate boom placement fashion) and Contact actuation (allows very fast repetitive smash placement).
But retrieve to place the nose of the tool pointed abroad from you, feed a strip of nails into the magazine with the nails pointed downward and at the angle like the bending of the magazine. If the nails are placed in the boom gun at the wrong bending it will misfire and jam.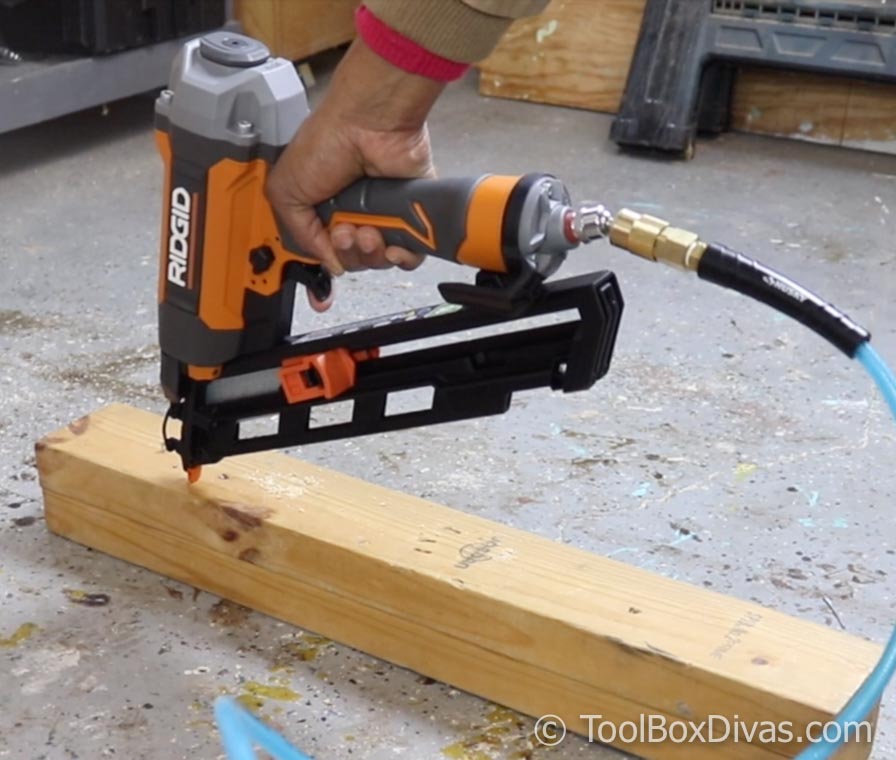
One time you're done using the tool disconnect the hose.
Stride vi. Powering Down and Depressuring the Compressor.
Turn the compressor off and unplug the compressor. Disconnect the hose.
Pull the ring on the force per unit area relief valve to release air from the tank until tank pressure estimate reads less than 20 psi.
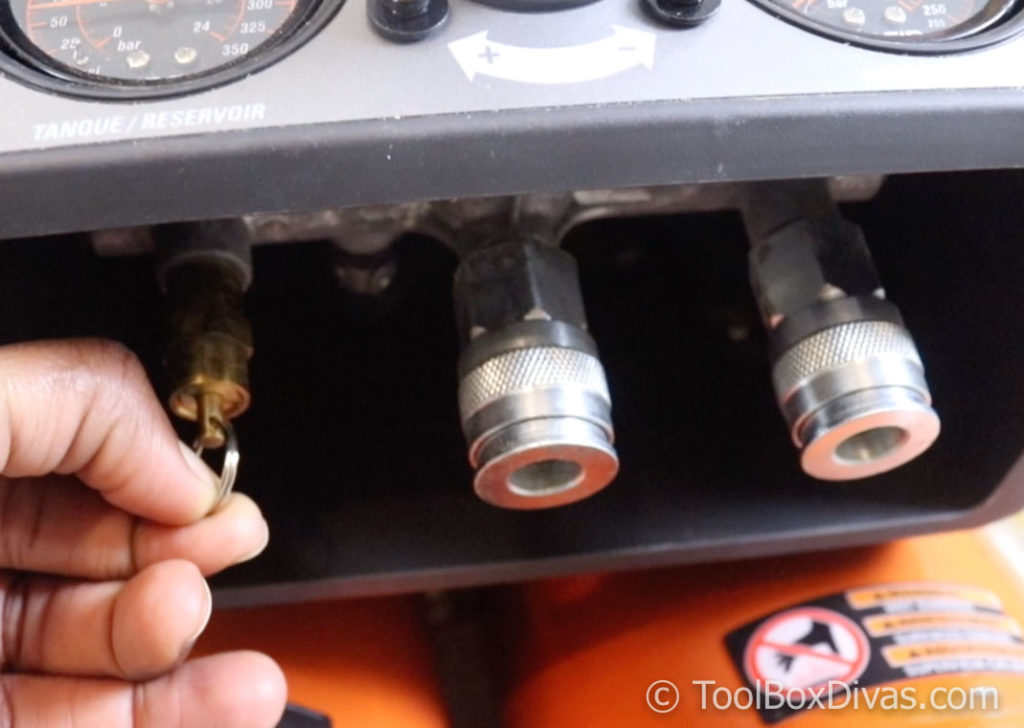
Once the tank force per unit area gauge reads 20 PSI or lower, you tin can safely tilt the compressor to drain moisture from the tanks.

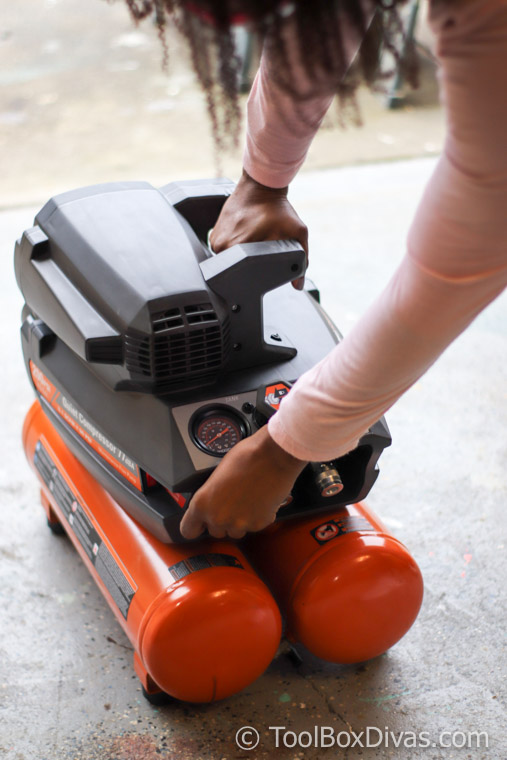
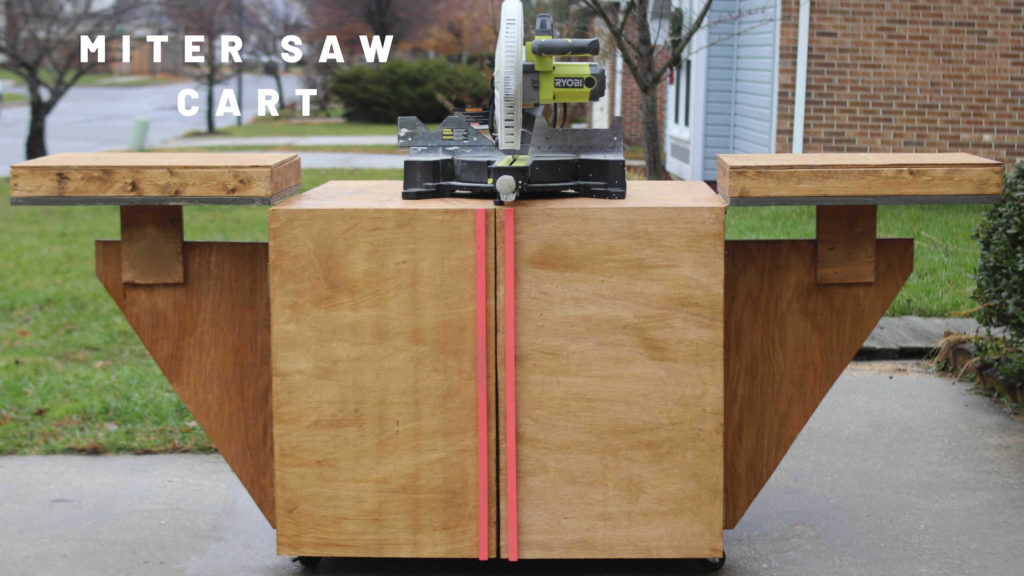
I hope this helps you lot get started setting upward your air compressor and using a pneumatic finish nailer. Stay tuned I'k going to bear witness you lot how I store my RIDGID 4.v Gal. Portable Electrical Quiet Air Compressor. This compressor is portable, it is a bit heavy for me to pick upwards and move about my workshop. I've outfitted my new Miter Saw cart to store my compressor. I can now motion the cart and run the hose from it without having to choice it up.
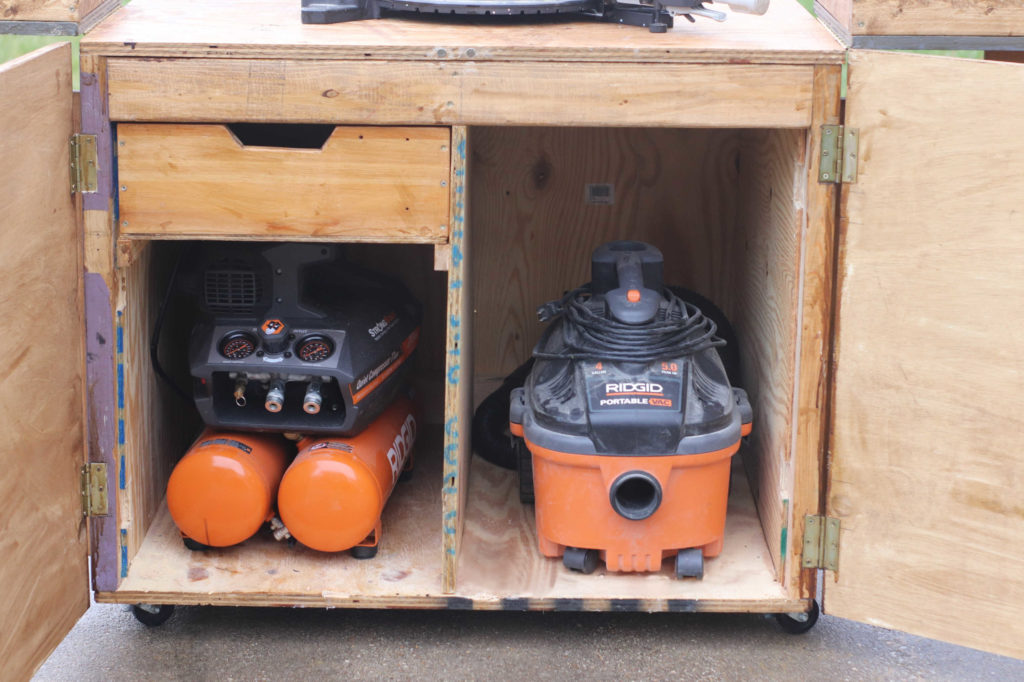
Check out how I made this Mitercart past disassembling my erstwhile cart and using the boards to create a larger cart that at present suits my workshop and needs.
I acknowledge that The Home Depot is partnering with me to participate in the ProSpective 2018 Campaign. As a function of the Program, I am receiving compensation in the grade of products and services, for the purpose of promoting TheDwelling Depot. All expressed opinions and experiences are my own words. My post complies with the Word Of Mouth Marketing Association (WOMMA) Ethics Code and applicable Federal Trade Committee guidelines.
For more tool tutorials and home maintenance projects bank check out these posts:

Source: https://toolboxdivas.com/tools-101-how-to-setup-and-use-an-air-compressor-and-finish-nail-gun/
Posted by: smithgoodgicess59.blogspot.com
0 Response to "How To Use A Nail Gun With An Air Compressor"
Post a Comment